How to connect and set up the Wireless Network Camera System?
1. Connect the DC 12V/2A power adapter to the Power port of the NVR.
When Power indicator light is on, NVR starts to work.
2. Use VGA / HDMI cable to connect your NVR and Monitor / TV, then preview interface can be seen.
3. Plug the network cable and mouse to the ports of NVR rear panel.
4. Connect the DC 12V/1A power adapter to the IP camera (IPC).
Each camera has one 6ft length power adapter.
5. After finish connecting, the NVR will search the IPC automatically and start to initialize the connection.
When completed connection, the images will display.
6. Login this system:
Username : admin
Password: (there is no password, please keep it blank)
(Note: if you want to change the password, you can go to NVR's System Setup - System Admin -User management - Set password to change it.)
7. Then you can follow up the below steps to set up on your phone:
If you want to view the cameras remotely, the NVR should be connected WAN network, Please ensure DHCP in your Router is open.
If you don't know how to enable the Router's DHCP, please input the IP Address of your
Router to IE browser, then you will find the network information, you can enable the "DHCP".
After that, please go to NVR's System Setup - Network Setup to enable "DHCP"
Then the system will obtain the IP Address, DNS from your Router automatically.

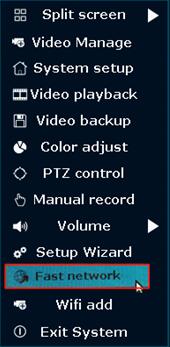
Or you can go back main menu to select "Fast Network", Then the system will connect the WAN network automatically.
8. Access from smartphone
(1). Please download "Eseecloud" app from App store or Google play on your phone.

(2). If install and open "Eseecloud" app at the first time, an account need to be registered initially.

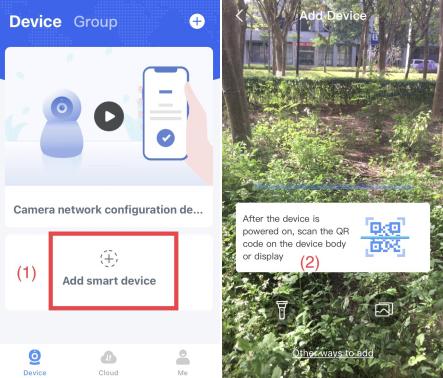
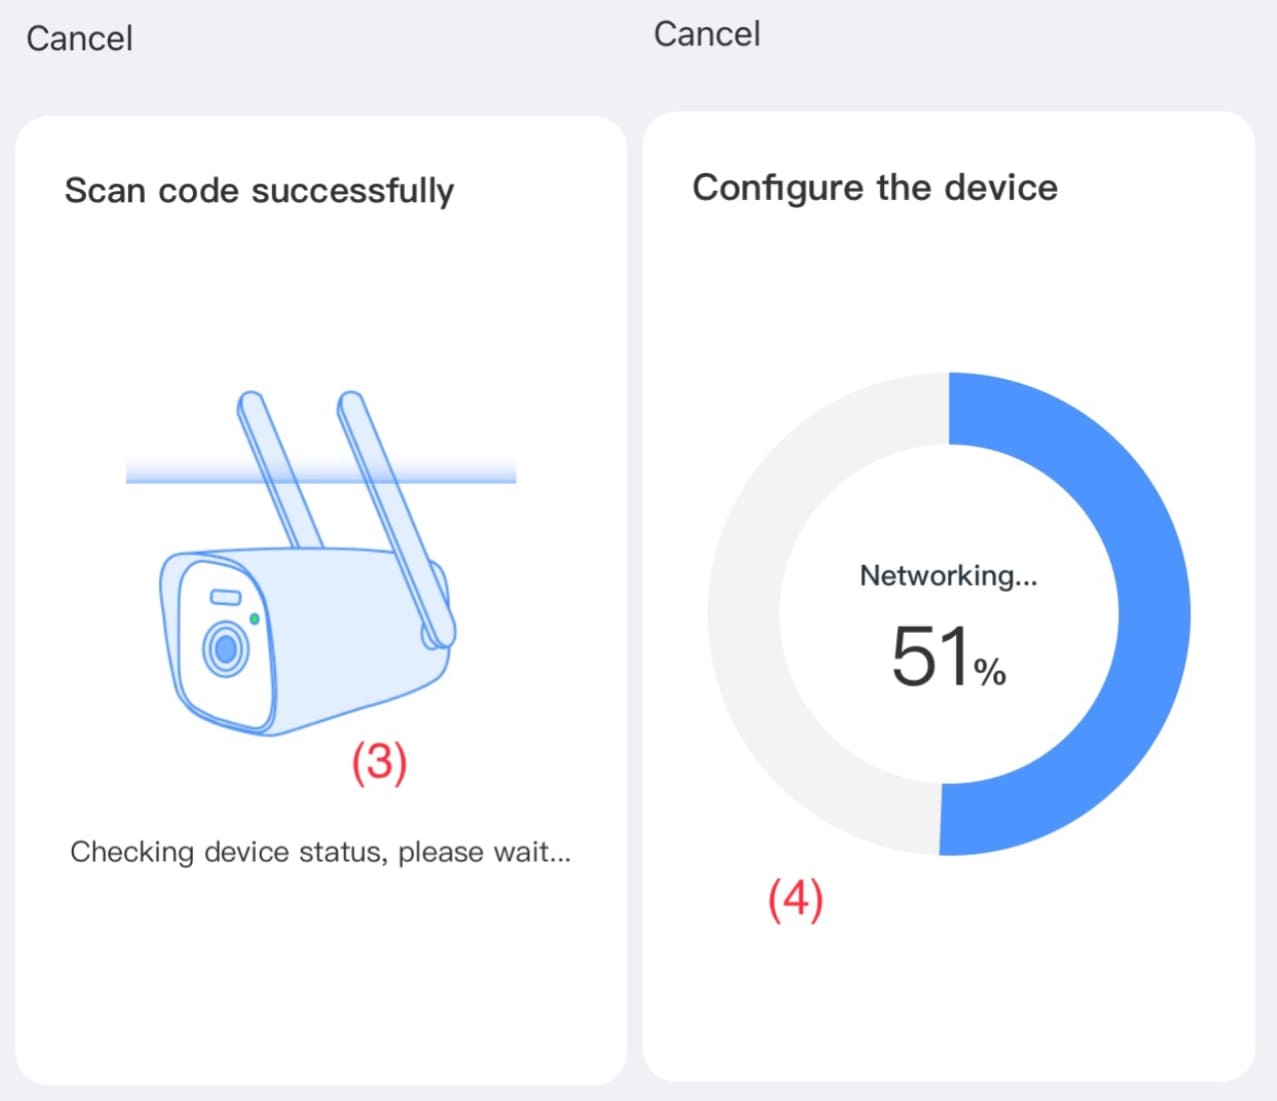
(3) Add the device.
Method 1: Add the device via QR code.
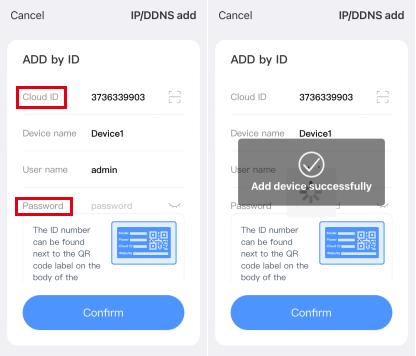
Method 2: Add by cloud ID.
Cloud ID: Enter NVR's System Setup - Network Setup to input Cloud ID or Scan QR Code)
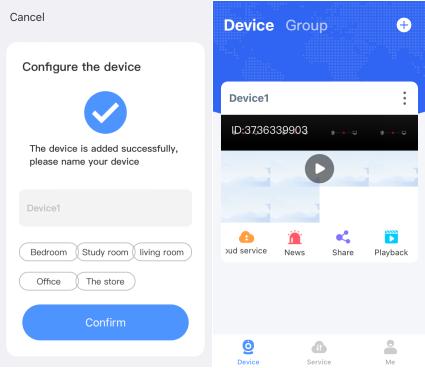
Device name: Choose a name for your system of your choice.
User Name: Enter the NVR's User Name (default: admin)
Password: Enter the NVR's Password (default: NO password)
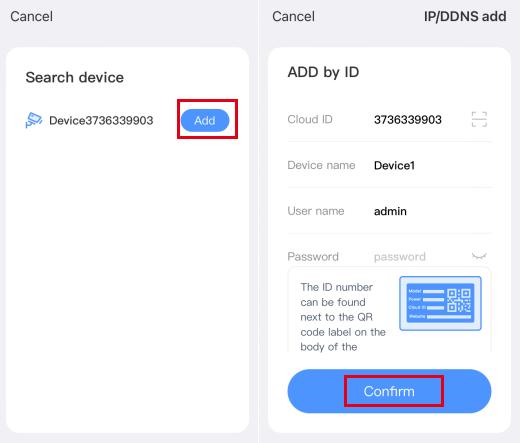
Method 3: Add by LAN scan.
Please make sure you are connected to the same wifi.

9. Access from remote PC (Log in with Cloud ID)
PC : our item only support IE browser, please input "www.e-seenet.com" to IE Browser to view your cameras.
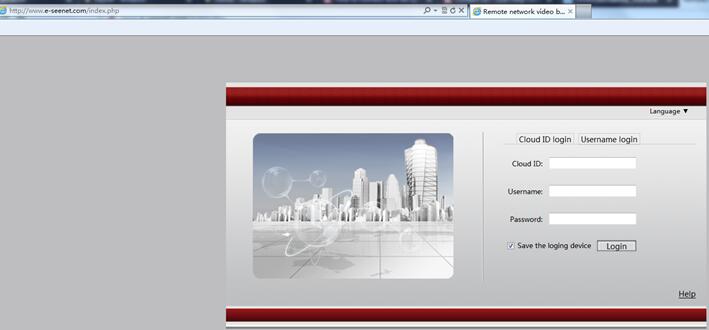
Cloud ID: (Enter NVR's System Setup - Network Setup to input ID or Scan QR Code)
Username: Enter the NVR's User Name (default: admin)
Password: Enter the NVR's Password (default: NO password)
(Input the correct Cloud ID, user name and password, click login to enter live view interface.)
More questions, please contact us freely: service@tontonsecurity.com